Thursday, December 20, 2012

Whipped Sweet Potatoes

It's winter time, and my favorite vegetables seem to be dark green & bright orange!  Get ready for my next few recipes to consist of those colors.  I am so happy to get this post done right now... The challenges of my first year as a PhD grad student seemed to have gotten the best of me & my time, and my recipes have been piling up!
I recently had the pleasure of purchasing a handful of gorgeous, large sweet potatoes from the Roanoke City Market; and felt like spicing up my typical way of cooking them.  Usually I'll clean them up, prick with a fork, wrap 'em in foil & throw it in the oven until their ready, but recently tried a new way that turned out absolutely wonderful!  By rubbing sugar, spices and butter over the skin and wrapping tightly in foil, the skin gets very soft when baked and breaks apart easily.  You can't even tell there's skin in the finished product.
And now for some nutrition tidbits... Keeping the skin on is an easy way to boost the fiber content.  Another plus: sweet potatoes (NOT yams!!) are one of the best sources of vitamin A & provitamin A Beta-carotene; which are fat-soluble.  This is why it's important to have some (**key word: "some") healthy fats with your veggies.  On a molecular level; vitamin A plays a critical role in the synthesis of rhodopsin & light receptor pigments inside of your eyes; basically we need vitamin A for night vision.  Vitamin A is also important in cell growth, bone development, and plays a role in the immune system, in case you were wondering.
Okay, enough of my nutrition rant.... let's get to the good stuff!


Whipped Sweet Potatoes

Ingredients:

  • 4 medium to large sweet potatoes; scrubbed clean
  • 2.5 Tbsp butter, softened (I prefer using Smart-Balance butters - blended w/ canola or olive oil...it's already soft & gives you a better variety of healthy fats!)
  • 1.5 Tbsp pumpkin pie spice*
  • 1 Tbsp dark brown sugar
  • 1 Tbsp pure maple syrup
Garnish: chopped, toasted pecans
Other materials needed: aluminum foil, mixer with flat beater attachment (a hand blender or food processor would work as well)

Directions:

Preheat oven to 350 degrees Fahrenheit.
After rinsing & scrubbing sweet potatoes, wipe dry & prick the surface all around with a fork; set aside.  Tear off 4 sheets of aluminum foil, large enough to fully wrap your sweet potatoes in; set aside.  In a small bowl, mix together softened butter, pumpkin pie spice, syrup & sugar.  With your hands, rub the sugar & spice-butter mixture around the outside of each sweet potato.  Tightly wrap each potato in aluminum foil, place on a baking sheet and put in the oven to bake at 350 degrees for 45 - 60 minutes; flipping potatoes over after about 30 minutes of baking.

To tell if the sweet potatoes are cooked through, they should be easily pierced through with a knife.  Don't worry though...overcooking won't hurt these!  After they're done, remove from the oven, open up some of the foil, allowing steam to escape, and let cool slightly for about 10-15 min.

While they're cooling, set up your blender with the flat beater attached.  With your hands, pinch off the hard tips/ends of the sweet potatoes & discard.  The rest of the skin should be very soft.  Break the sweet potatoes in half & toss into the mixer bowl, making sure to pour any of the buttery-syrupy juices (from inside the foil) into the mixing bowl too.  Beat on medium-high speed with a flat-beater (or whisk) attachment until potatoes are soft, fluffy with a whipped-like texture.  Spoon & serve.
For a little crunch, garnish these spuds with toasted, chopped pecans.

*Note: If you don't have pumpkin pie spice, here's an easy substitute:

  • 2 tsp ground cinnamon
  • 1 tsp ground ginger
  • 3/4 tsp ground allspice
  • 1/2 tsp ground nutmeg
  • 1/8 tsp ground cloves

Monday, October 22, 2012

7 Summits Challenge - Poor Mountain

The first thing we learned about Poor Mountain...it was anything but that.   It is known for its poor soil that's weathered from sandstone bedrock; yet ironically famous for having a variety of lush native plant species.  This ridgetop is primarily a xeric (dry, requiring little moisture) Table Mountain pine and oak woodland. If you're hiking during the right time of the year, you'll be delighted to see a number of huckleberry and wild blueberry bushes.  A number of rare plants & shrubs call this mountain home, specifically one called piratebush.  The Poor Mountain Preserve contains the world's larges population of this globally rare shrub; confined to a select few mountains in Tennessee, North Carolina, and Virginia.  After researching this mountain, I quickly learned that piratebush was the main attraction here (picture below).  This shrub is described to be parasitic in nature; because it requires less chlorophyll than most other plants, its foliage is pale green in color.  The leaves of this rare shrub turn a bright, brilliant yellow in the fall; unfortunately we were about 2-3 weeks too early to see the color change. 

Back to the hike...this was another completely new one for the three of us...well, 4 of us if we count Samantha's dog Bob.  After driving up a windy & narrow road up the mountain, we finally fell upon the start of the trail.  The preserve covers 925 untouched acres consisting of a few interconnecting trails: Overlook Trail, Canyon Trail, Cascade Trail & the Piratebush Loop.  We took the main overlook trail loop, close to 4 miles long; which took us about 500 vertical feet down the mountain then back up.  The trail led us through steep windy paths with spectacular overlooks of the scenic vista peeking through the lush forest trees.  We were welcomed with a little ravine (which Bob throughly enjoyed splashing around in) at the base of the loop.  

As far as difficulty goes, I'd rank this as moderate to slightly difficult terrain...the difficult part being the burning of our thigh & glute muscles during the steep climb back up the ridge!  All in all, this is a beautiful hike that should probably be done during the mid-late summer; and then again in the fall while the leaves are changing.  One more peak checked off in our challenge...5 more to go!  (up next is Read Mountain)

If you're interested in checking out the preserve, here's a link to a helpful printout & area map.


Mid-hike Overlook


Leaves of Fall


Piratebush
Bob's turtle discovery

Wednesday, September 19, 2012

Roanoke 7 Summits Challenge - week 1

I've recently signed up to join a "7 peaks in 7 weeks" hiking challenge with a couple of my friends; so for fun I'm going to highlight each one in my blog.  I noticed a banner for the Roanoke 7 Summits while jogging on the Roanoke River Greenway with my friend Sallie Beth, so after checking out the website I decided to get out of my comfort zone & take on a new challenge.  I love being outdoors more than anything; and have to admit I've been slacking off pretty hard in this area recently.  Sometimes we (by we I mean "I") get so caught up in the rush of day-to-day life that we forget about the little things.  In this case, I have forgotten about how great it feels to breathe the fresh air of the mountains and discover the simple joys right in my backyard.  With this said, my new goal is to get outside more often & explore the endless outdoor opportunities that Southwest VA has to offer.  With my new goal in mind, I just can't resist taking on the 7 summits!  I recruited two of my new friends from Virginia Tech, SB & Samantha, to join me. The fact that it took practically zero convincing on my end, let me know we were going to have a great time together.

the 3 girls on Day 1
Our shoes :)
Week 1 - Mill Mountain Star Trail

It's hard to say what the best part of our first trip was -- the hike, or the amazing discovery that followed.  If you're not familiar with the Roanoke area, this trail may be one of the closest hikes from downtown (~5 minutes).  If you love running uphill, you can even throw on a pair of running shoes & march your feet halfway up the mountain to catch the hiking trail that'll take you up the rest of the way.  This was a perfect trail to kick off the challenge; relatively easy terrain and short in distance (~2.4 miles for the proposed loop).  In our case we took a few alternate paths which made our hike closer to 4 mi.

After trekking down and back up the mountain, we made it to Roanoke's highest point - the summit of Mill Mountain & the Roanoke Star.  The famous Star (picture below) overlooks the city of Roanoke and it's surrounding areas.  The steel star which sits at the top of this mountain was built in 1949; and at 88 feet tall it's the world's largest man-made star.  The star is lit up every night & (according to the internet) it's visible from 60 miles away!  Pretty impressive, eh?  There's over 500 acres of parkland on top of Mill Mountain, including picnic areas, two amazing overlooks (one being the star), a Discovery Center, and a Zoo!  Basically enough to keep you busy for a while.

After our hike we decided to check out the Roanoke City Market in downtown which came to be the "amazing discovery" I mentioned earlier.  This farmer's market is filled (42+ booths) with fresh local produce, meats, flowers, delicious baked goods, hand made soap, arts/crafts, etc, etc, etc.... We were like kids in a candy store in awe over the endless beautiful fresh produce!  The best part - the produce was significantly cheaper than my local grocery store and (sorry to say this) my local farmer's market.  Thanks to this discovery, SB and I will now be taking the trolly from work to the market on the days we travel to our Roanoke office.

Before heading back to Blacksburg we ate at one of my favorite restaurants, Fork in the Alley, a tucked away brick oven pub with an awesome outdoor patio, good beer selection, and delicious food.  The only downside to this place is figuring out what to eat off the menu...everything is great!  At least you won't have trouble deciding on what dessert to have (in moderation of course), there's only one choice:  the Brick Oven S'more.  This to-die-for treat is toasted to perfection, with a milk chocolate bar half melted over 2 marshmallows and peanut butter, then sandwiched between graham crackers.  Let me remind you as my blog title says "healthy living" I don't recommend partaking in this type of treat everyday.  Sweet treats should be just that - treats; and enjoyed in moderation.  Otherwise it wouldn't be a treat, right?

After our market-lunch extravaganza we went back home with our bellies full and legs tired.  Next week we'll be heading over to Poor Mountain Natural Area Preserve; our second summit!  I hope you enjoy these next few posts and if you're feeling adventurous go exploring in your own backyard, breathe some fresh air, & see all that nature has to offer you!
Happy Hiking~

Map of Trail
The start of Monument trail
scenery
Overlook at the top... foggy morning

Some history
The Roanoke Star

Candy Store!
the sign says: "Peanut Pumpkin (yes you can eat it)"
S'more Heaven!


Tuesday, August 28, 2012

Mexi-Slaw


If you're looking for a low-fat, colorful, healthy side dish, taco, or sandwich topping; then this flavorful slaw will fit your needs.  I originally made this to put over fish tacos, and found it to be quite versatile! It's great over turkey burgers, any tex-mex style dish, or just  by itself!  It's such a basic recipe that can be transformed to fit almost any dish.  For example - Omit the jalapeños & lime juice; add 1 teaspoon of ground mustard & 1/2 teaspoon of celery salt and you have a perfect vinegar based slaw to top over your favorite BBQ sandwich.  Try that version over my Grilled Tempeh BBQ Sloppy Joe's to satisfy your BBQ cravings without over-satisfying your cholesterol & saturated fat allotment.  If you're looking for a creamier slaw, add a little bit of reduced fat sour cream or nonfat plain greek yogurt.  Greek yogurt is naturally tart, therefore substitutes well for sour cream in quite a few dishes.  If you want to switch it up, just remember the things you need:  carrots, cabbage, onion, red/orange/yellow bell pepper, vinegar (usually white wine or rice vinegar; red wine vinegar or apple cider vinegar may also be used or mixed), vegetable oil, white sugar (not that healthy, I know..but it wont be the same without), and pepper.  Mix & match how you like & create your own colorful & flavorful slaw!  I absolutely love this dish; many times finding myself eating it by the bowl...  Not only is it full of flavor, but it's packed with good for you vitamins, minerals, antioxidants, and fiber (something we can all use a little more of).  Taken alone, these micronutrients don't always do their best work; but put them together & you've got a powerhouse of nutrients!
I've made this recipe (or some version of it) for company it's always a hit; which is why I'm sharing it with you...Enjoy!


Mexi-Coleslaw

  • 3 large carrots; peeled, & grated
  • one 10 ounce bag of shredded Red Cabbage (~4 cups)
  • 1 small - medium head of green cabbage; rinsed & shredded
  • 1 sweet onion (Vidalia); very thinly sliced & diced
  • 1 sweet bell pepper (red, orange or yellow); seeded & thinly sliced (~1/8" slice)
  • 1 cup coarsely chopped cilantro 
  • 2 jalapeños, seeded & very thinly sliced & diced
  • juice of 1 lime (or 1 1/2 limes if they're small)
  • 1/3 to 1/2 cup white rice vinegar
  • 1 Tbsp apple cider vinegar
  • 1/3 cup vegetable/canola oil
  • 1/4 cup white sugar
  • 1 tsp fresh ground black pepper
  • dash salt
Directions:
Peel, prep, slice & dice all your veggies & herbs (carrots thru jalapeños).   Place into one large mixing bowl.  Measure & combine the rest of your liquid ingredients, sugar, pepper & salt into a bowl & mix until well combined.  Pour dressing over the slaw veggies and toss to evenly coat.  Cover and refrigerate for at least an hour before serving.  Keep in mind that cabbage has tough leaves, so it takes a while for the dressing to soak into it and soften the leaves.  The longer it sits & marinates...the better it will be!  When it's ready, take out of the fridge & serve however you'd like!

Tuesday, July 31, 2012

Whole Wheat Grilled Pizza Dough + Food Science


It doesn't get much better than homemade pizza.  It's also a simple & fun idea for dinner parties--make this ahead & portion out  individual crusts...then at dinner time have each person make their own pizza.  The best part - it significantly cuts down on planning/cooking work to do as the hostess (or host)!  

When I first came across a grilled pizza recipe, I'd have to say I was a little skeptical.  The crispy, nutty whole grain crust was just what I wanted from a pizza.  I typically shy away from recipes calling for yeast; mainly because of a personal fear of messing it up--which is strange, because it's a very simple process.  If you are in the habit of buying pre-made crusts; making your own can be much healthier and economical alternative.  Personally..I'm a little shocked at how expensive pizza crusts can be.  It's no wonder so many Americans choose to buy unhealthy, high-fat pizzas for $5.00 from Little Caesars when a whole wheat Boboli pizza crust costs the same amount at the grocery store!  Okay, that's the end of my ranting...let's get to the good stuff!

There are some critical steps to making dough; but once you know the basics to the science, you will see it is actually quite easy to do!  Each ingredient in dough making plays a very specific, scientific role.  First you must understand the role of gluten.  Gluten results when two proteins (glutenin and gliadin) are combined with a liquid (in this case water).  The most important thing to know about gluten is that it doesn't exist until it is combined with liquid.  Gluten gives the dough elasticity, helps it rise, hold its shape, and create the texture you want.  This elastic gluten is what allows dough to strech as it rises.  Different flours have different levels of protein (gluten), which is important factor when thinking of the type of dough to use.  Bread flour typically has a higher protein content (12.5-13.5%) than all-purpose flour (10-12%) or cake flour (7-9%).  Thanks to its high protein content, bread flour makes a firmer, stronger dough and is ideal for breads and hand-tossed pizza crust.  Now, thinking about the opposite...low protein flours (ie. cake flour) produce less gluten; resulting in a softer, weaker dough with a crumb texture.  That's an important thing to keep in mind when substituting flours in baking.  Basically, the more gluten in flour--the more firm your product will be.  Whole wheat flour creates less gluten than all-purpose flour; therefore creating a more dense loaf.  Bread flour naturally has more gluten in it, so incorporating the two flours is helpful when trying to achieve that firmer texture in pizza crust.

Yeast is equally important in dough making.  It is a living microscopic, single-celled organism that feeds on sugars and starches; producing alcohol and carbon dioxide waste by-products.  This process is known as fermentation.  Fermentation in food processing is the conversion of carbohydrates to alcohols and carbon dioxide using yeasts, bacteria, or both.  In bread making, the carbon dioxide produced by yeast gets trapped and is what causes the dough to rise, or leaven.  Because yeast is a living organism, it's important to be aware of the date before using yeast.  Expired yeast could prevent bread from rising.  The step requiring most caution is adding liquid to the yeast.  Just as the gluten is activated by liquid, so is yeast.  The only difference is the strict temperature range of water.  For active dry yeast (used in this recipe), you want the water to be somewhere between 105-115 degrees Fahrenheit.  Too hot and the yeast dies...too cold and your yeast is never activated.  This is why I recommend purchasing a kitchen thermometer if you don't already have one & plan on making any yeast breads in the future.

Sugar, salt & oil also play roles in bread making.  Sugar acts as food for yeast, allowing the leavening (rising) to happen; and is the main contributor in the browning of the bread.  This browning is called the Maillard reaction.  The Maillard reaction is a chemical reaction between an amino acid (protein) and sugar; requiring heat.  With the combination of sugar and heat, this reaction has an ability to create hundreds of new flavor compounds in baking.  Different amino acids create different levels of browning; thus different flavors.  A side note - the Maillard reaction is also a physiological step in the formation of advanced glycation endproducts (AGEs); an completely different topic!  Both sugar (or honey) and salt are hygroscopic ingredients, meaning they absorb moisture from their surroundings; which is a key step during baking.  Salt also gives flavor and controls yeast activity.  Oil (or fat) helps to tenderize bread by coating gluten strands so they can't combine as easily.  It also contributes to flavor, browning of bread, and helps to increase the shelf-life.

Now that you've gotten a brief overview of the science behind dough making, lets get to the good stuff....

Whole Wheat Grilled Pizza Dough

1 1/2 cups white whole-wheat flour
1 cup whole wheat bread flour
1 package active-dry yeast
3/4 to 1 cup warm water (105-115 degrees Fahrenheit)
1 Tbsp olive oil
1/2 Tbsp honey
1/2 tsp salt

*extra flour for kneading, and oil to grease a pan

Directions:
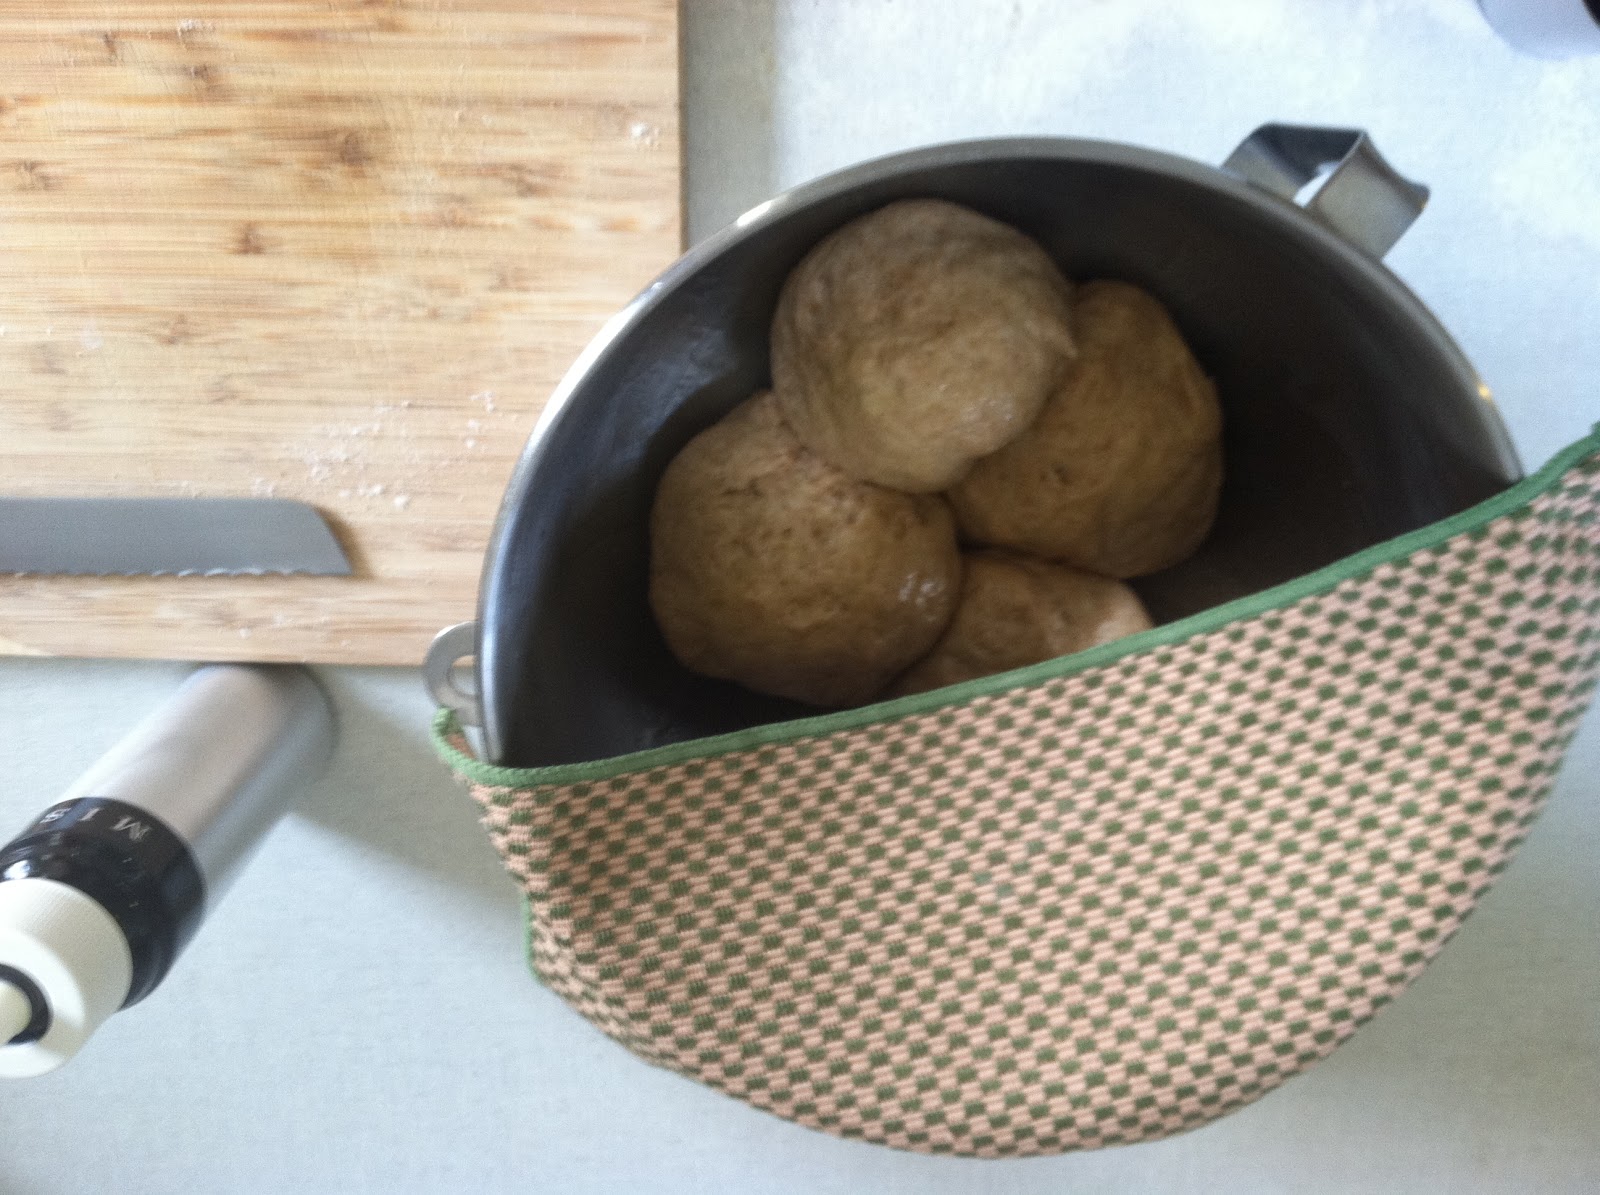
Measure and combine flours.  In a food processor combine flour, and yeast.  In a small bowl combine the warm water, olive oil, honey, and salt.  With the processor running, pour water mixture in a steady stream.  Process until dough forms a mass and starts to pull away from the side of the bowl (see pictures above).  Turn dough out onto a lightly floured surface.  Knead about 5 minutes, until smooth & elastic.  This can also be done using the dough hook attachment on your stand mixer.
If using the knead hook, stop mixer, remove dough, and turn out onto a lightly floured surface.  Shape into a ball with your hands.  Place dough in greased bowl that is at least twice as large as the ball of dough.  Roll the dough around the bowl to grease the entire surface.  Cover dough and let rise in warm place until it doubles in size.  Covering the bowl with a towel or plastic wrap prevents oxygen from getting in; allowing the anaerobic process of fermentation to begin.  Let it rise in a draft-free place; about 80-85 degrees F.  A perfect place is inside of your oven with the oven light on.  The light helps it warm up and rise.
Remove dough & make sure it's ready for the second kneading.  Press two of your fingers about 1/2 to 1 inch deep into the center of the dough.  If the indentations remain after you remove your fingers, the dough has doubled in size and is ready for the second kneading.  Deflate the dough by punching your fist into the center.  This releases some of the gasses, making it easier to shape.  Remove dough from bowl, and reshape into a ball again.  Cut the dough into equal portions using a serrated knife, reshape each portion into a ball.  Lightly dust any surfaces with flour if the dough gets too sticky.  Place balls of dough back into the greased bowl, cover with a towel or plastic wrap, and let rest for about 10-15 more minutes.
Remove dough portions, and pat each piece into a disc.  On a lightly floured surface, roll out each portion to a thin circle (about 8-10 inches in diameter).  Line a baking sheet with waxed or parchment paper. Stack pizza dough rounds on the baking sheet, separating each piece with a sheet of paper.  Wrap and freeze the dough for at least 2 hours, until firm and frozen.
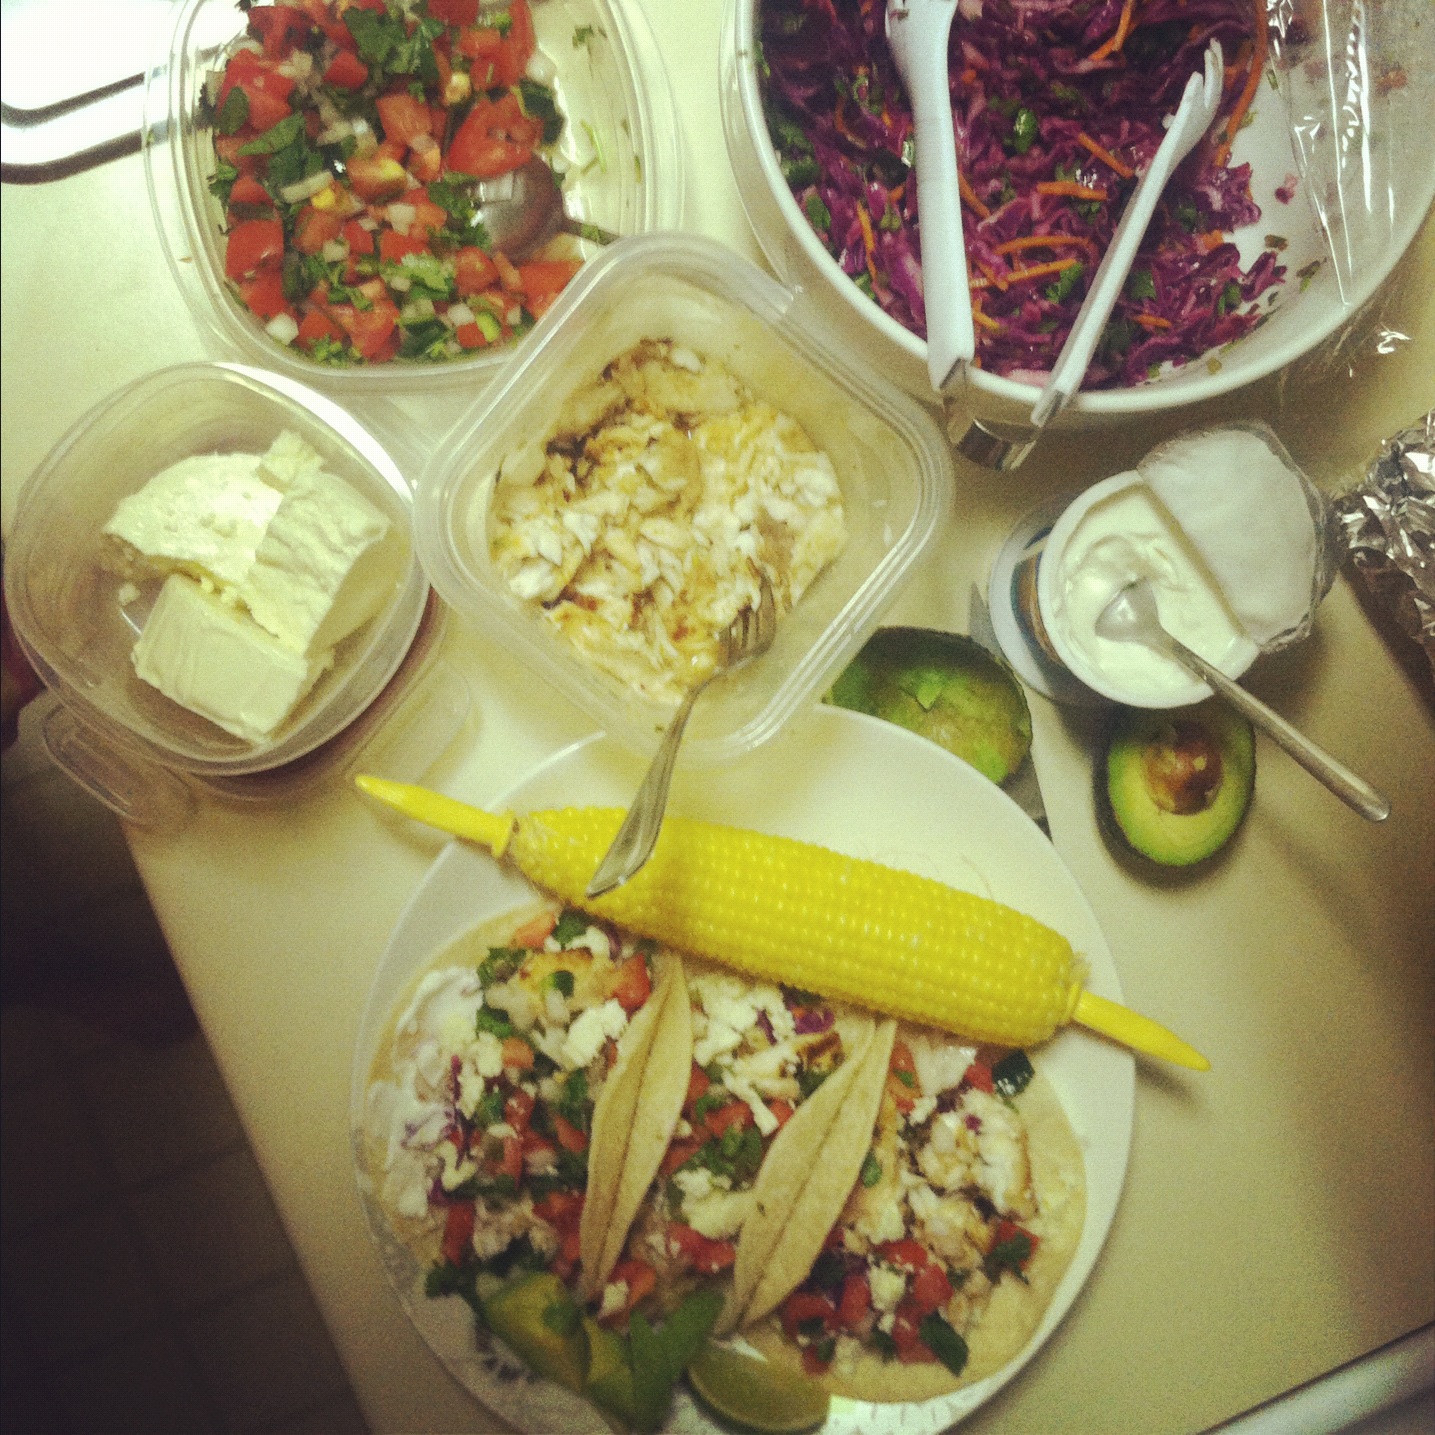
For grilling:  remove crusts from freezer, discard wax paper.  Lightly brush the crust with olive oil. Heat grill to medium heat.  Carefully slide the oiled pizza dough directly onto the grill rack.  Grill uncovered for 1 to 2 minutes or until dough puffs up in some places, starting to become firm.  Using large tongs or a grilling spatula, carefully and quickly turn the crust over and transfer to a baking sheet.  For each pizza, spread the crispier side of the crust with your desired pizza sauce, toppings and cheese.  Transfer the pizzas carefully back to the grill.  Grill for a couple minutes on a lower heat until cheese is melted and the crust is crisp.  Remove pizzas, transfer to a cutting board, slice, serve & enjoy!

*Note:  If you are cooking on the lower grill rack, or if you have a hot grill, cook the pizza on top of an iron skillet to prevent the bottom from burning too quickly.  I tested it with my old grill & it worked out well.

**when using wheat flour-- whole wheat dough is stickier, making it more difficult to shape sometimes.  If you find yourself adding too much flour during the kneading process to keep your hands from sticking; instead put a little oil on your hands.  This will help keep the dough from getting too firm.


Monday, July 23, 2012

Cilantro-Lime Grilled Tilapia


Yep..another grilling recipe.  I pretty much stop using the oven during the warm, summer months.  Tilapia is such a simple and versatile fish to cook.  Also known as Cherry Snapper, Lemon Snapper, Nile Perch, Red & Blue Hybrids, or St. Peter's Fish.  If you're the type that doesn't like the taste or smell of fish; I'd highly recommend trying tilapia before scratching off all seafood in your book.

Tilapia is a fast growing farmed fish.  It's short life-span and low-protein diet (tilapia require very little fishmeal & fish oil in their feed) gives this fish a very low mercury level.  Tilapia can also be a sustainable choice of fish for these reasons, if you buy from the right place.  US farmed tilapia are the most sustainable choice.  Most US tilapia farms use low-risk re-circulating systems; which produce less pollution than other methods of farming.  Another interesting fact:  these tasty fish are resistant to and have a very low incidence of disease, which means chemicals, antibiotics or drugs are rarely (if ever) added to their water.  The one downside is that they are an aggressive tropical species which makes them a threat to native freshwater fish populations if they were to escape from the farms.  If you are curious about seafood sustainability; and where to buy the best fish, I recommend researching the Blue Ocean Institute website.  They have a great guide to seafood.  If you're an app geek (like me), they also have a wonderful mobile app called "Fish Phone" available on iTunes.  The app is very handy, especially while you grocery shop.

Okay, now to the recipe.   I recently threw this together and experimented in hopes of having a crispy Panko-topping (Panko are Japanese-style breadcrumbs).  Turns out the breadcrumbs just got soggy, which makes total sense--the heat source comes from below in a grill (not above); duh!  The only reason I am keeping the breadcrumbs in the recipe is because of how good it turned out.  My theory is that the breadcrumbs absorbed the marinade while cooking, keeping moisture from escaping; thus making the fish incredibly moist, flaky, and flavorful!  I've marinated fish using similar ingredients in the past, but never has it come out this delicious.  The downfall..a very thin layer of soggy breadcrumbs on top of the fish; which is easily fixed by scraping it off with the edge of a fork.  I honestly don't know if it was the Panko, or something else; all I know is that this was the tastiest fish I've grilled in a long time.. Enjoy!

Cilantro-Lime Grilled Tilapia

Ingredients:

  • 3 Tilapia fillets (about 1 to 1.25 lbs)
  • 1 Tbsp Olive Oil
  • 1/4 cup GOYA Mojo Criollo*
  • 1/8 cup cider vinegar
  • Juice of 1 lime
  • 1/8 tsp ground black pepper
  • 1/4 cup coarsely chopped cilantro
  • 2 Tbsp Japanese-style Panko breadcrumbs
  • 1/4 tsp paprika
  • 1/8 tsp red cayenne pepper
  • aluminum foil
*Mojo is a Latin-American marinade with garlic, herbs, onion & citrus flavors; found in the international foods section in most grocery stores.  My mother used this in many dishes & whatever she made with it always turned out amazing; which is why it's become a staple in my fridge.  Moderation is key with this seasoning though, it does have a high sodium content.

Directions:

Prepare & measure ingredients.  Place fillets on a sheet of wax paper or aluminum foil over a large plate.  In a bowl, mix together oil, Mojo, vinegar, lime juice, pepper & cilantro.  Pour over fish, coating all sides.  Cover and marinade for 30 minutes, turning fish over halfway.  In a small bowl or ramekin, mix Panko, paprika, and cayenne; reserve for later.

Warm up grill to medium heat.  Sprinkle breadcrumb mixture over top of each filet and place the fish on a large sheet of non-stick foil with edges folded up.  Pour any leftover marinade over it & place on the grill.  Loosely cover fish with foil, leaving some open room to allow steam to escape.  Grill over medium heat for about 10-12 minutes; flipping each filet over halfway.  The fish will be done when meat flakes off easily with a fork, or has reached a minimum internal temperature of 145 degrees Fahrenheit.  On a side note..if you're curious about the various cooking temperatures of meat and seafood, check out the governments food safety website.  When the fish is cooked, remove from grill and serve.  

For fish tacos:  flake off large pieces of fish with a fork & serve over corn tortillas with sliced avocado, diced tomatoes & jalepenos, cabbage slaw (recipe coming soon!), fresh cilantro, crumbled queso fresco, and a lime wedge.  For a healthy, low-fat, flavorful & fresh fish tacos; these are perfect!